Empirical Labs Distressor manuals, including EL8X, EL8, and EL8-S versions, are readily available online as PDFs, offering comprehensive guidance for users․
What is the Distressor?
The Empirical Labs Distressor is a highly regarded, versatile analog compressor celebrated for its unique ability to emulate the characteristics of several classic compressors, while also offering its own distinct sonic signature․ Often sought after by audio engineers, it’s known for its flexible control set and ability to add coloration and harmonic distortion․
User manuals detail its functionality, covering models like the EL8X, EL8, and EL8-S․ These guides explain how to navigate the unit’s various modes – Opto, Variable Mu, British, and “Nuke” – and how to utilize its controls for achieving a wide range of compression styles, from subtle smoothing to aggressive pumping․
Distressor EL8X vs․ EL8: Key Differences
The Distressor EL8X builds upon the foundation of the original EL8, introducing several enhancements․ Manuals highlight the EL8X’s expanded ratio selection, offering more precise control over compression․ A key addition is the “Analog Knee” feature, providing smoother, more musical compression characteristics․
Furthermore, the EL8X includes a sidechain filter with selectable frequencies, allowing for greater control over the compressor’s response to specific frequencies․ While both models share core functionality, the EL8X’s refinements cater to engineers seeking increased versatility and sonic nuance, as detailed in their respective user guides․
Distressor Applications: A Versatile Tool
Distressor manuals demonstrate its remarkable adaptability across diverse audio sources․ It excels at compressing drums, vocals, and bass, adding punch and clarity․ Beyond compression, the Distressor functions effectively as a saturator, imparting harmonic richness and warmth․
Its unique modes – Opto, Variable Mu, British, and Nuke – offer distinct tonal palettes․ User guides illustrate techniques like parallel compression and creative sidechaining․ The Distressor’s versatility makes it a staple in professional studios, capable of shaping sound with precision and character, as documented in available resources․

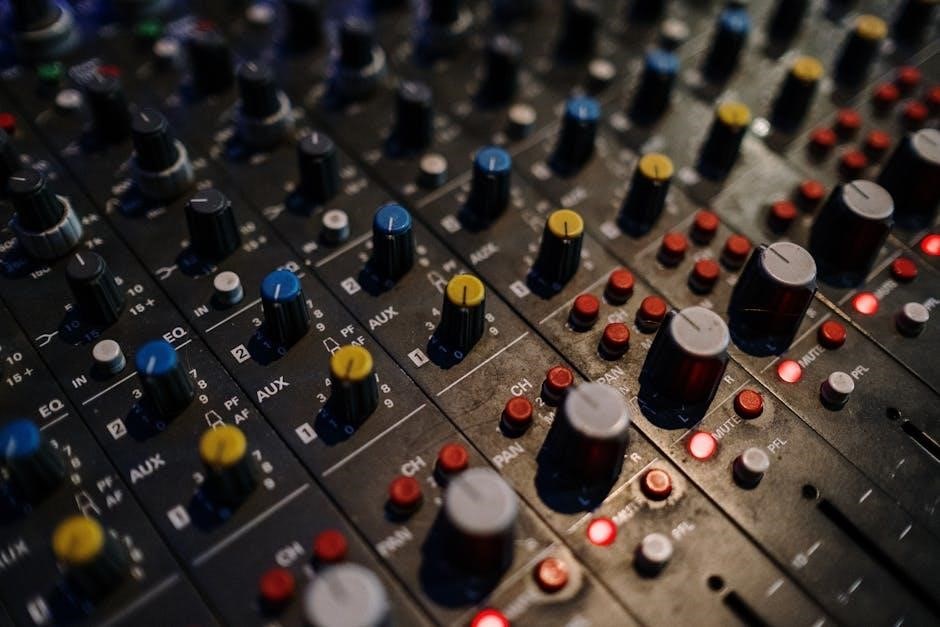
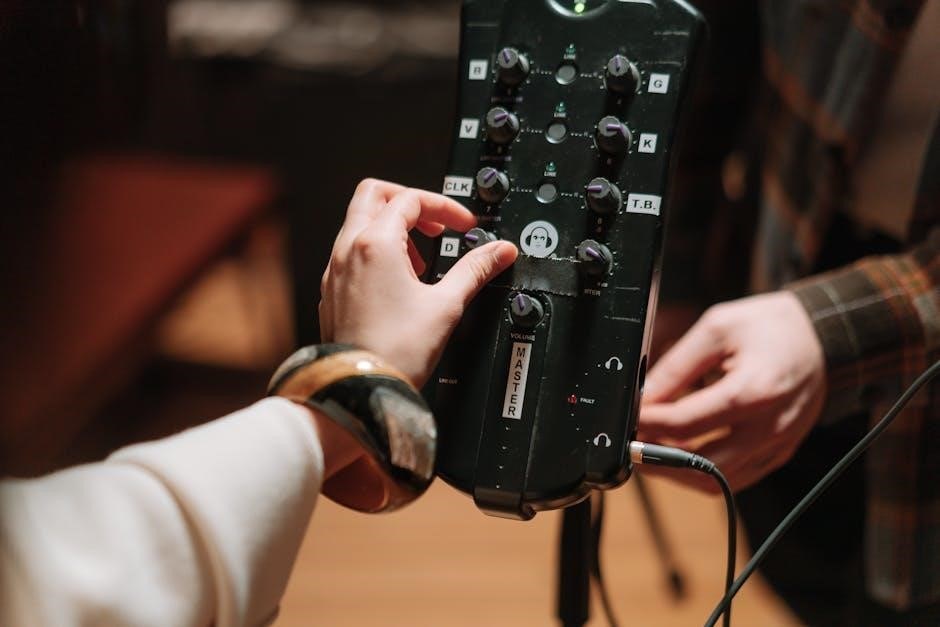
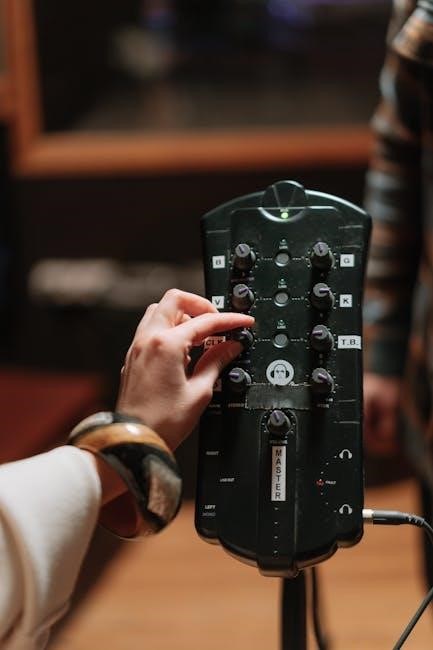
Front Panel Controls & Features
Distressor manuals detail the intuitive front panel layout, encompassing input/output gain, ratio settings, and precise attack/release controls for shaping dynamics․
Input & Output Gain Controls
Distressor manuals thoroughly explain the crucial role of input and output gain staging․ The input gain establishes the signal level entering the compressor, influencing the amount of compression applied and harmonic distortion generated․ Careful adjustment here is key to achieving desired tonal characteristics․
Conversely, the output gain controls the final signal level sent from the Distressor, allowing for makeup gain to compensate for compression-induced volume reduction․ Mastering these controls, as detailed in the user guides, ensures optimal signal-to-noise ratio and prevents clipping․ Understanding their interplay is fundamental to effective Distressor operation․
Ratio Settings & Threshold Adjustment
Distressor manuals detail how ratio settings dictate the amount of compression applied for signals exceeding the set threshold․ Lower ratios (e․g․, 1․5:1) provide subtle gain reduction, while higher ratios (e․g․, 20:1) deliver aggressive limiting․ The threshold determines the signal level at which compression begins․
User guides emphasize the interactive relationship between these controls; lowering the threshold increases compression sensitivity․ Each ratio mode—Opto, Variable Mu, British, and Nuke—responds uniquely to these adjustments, offering diverse sonic possibilities․ Precise control is vital for shaping dynamics effectively․
Attack & Release Time Controls
Distressor manuals explain that attack time governs how quickly the compressor reacts to signals exceeding the threshold, ranging from incredibly fast to relatively slow․ Shorter attack times grab transients, while longer times allow initial peaks to pass through․ Release time dictates how quickly compression returns to normal after the signal falls below the threshold․
Guides highlight the importance of balancing these parameters; fast attack/release can sound harsh, while slow settings can cause pumping․ The Distressor’s unique detector circuits influence these timings, offering nuanced control over dynamic shaping and sonic character․
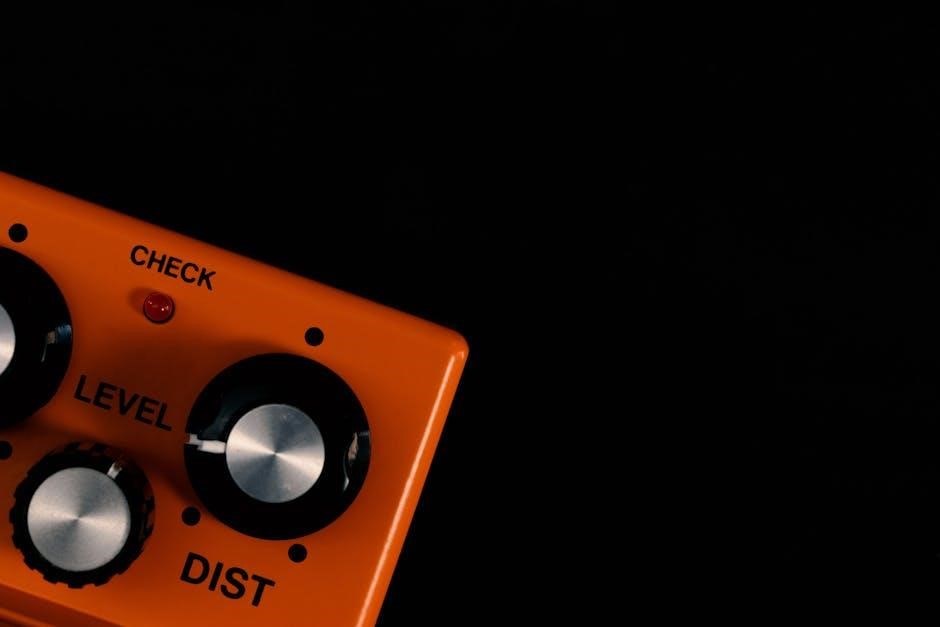
Distortion Harmonics: A Core Feature
Distressor manuals emphasize that the unit isn’t solely a compressor; it’s renowned for its ability to add pleasing harmonic distortion․ This isn’t accidental – the Distressor’s design intentionally introduces subtle (or not-so-subtle) saturation and harmonic richness when driven hard․
Different modes and settings alter the type and amount of distortion․ Users can achieve everything from gentle warmth to aggressive grit․ Manuals detail how to leverage this feature for thickening sounds, adding character, and achieving a vintage tone, making it a versatile tonal shaper․
Rear Panel Connections & Settings
Distressor manuals detail XLR inputs/outputs, sidechain connections with filtering options, and power supply/voltage requirements for optimal performance and safe operation․
XLR Inputs & Outputs
Distressor manuals thoroughly explain the rear panel’s XLR connections, crucial for integrating the unit into professional audio setups․ The balanced XLR inputs accept line-level signals, ensuring low noise and maximum signal integrity․ Corresponding XLR outputs deliver the processed audio, maintaining a professional standard․ Manuals detail proper cabling techniques, emphasizing the importance of balanced connections to minimize interference․
They also cover impedance matching considerations for optimal signal transfer․ Furthermore, the documentation clarifies the pin assignments (Pin 1: Ground, Pin 2: Hot, Pin 3: Cold) for both inputs and outputs, preventing incorrect wiring․ Understanding these connections, as outlined in the manual, is fundamental for achieving clean and reliable audio processing with the Distressor․
Sidechain Input & Filtering
Distressor manuals dedicate significant attention to the sidechain functionality, a powerful feature for dynamic control․ The sidechain input, accessible via the rear panel, allows external signals to influence the compressor’s behavior․ Manuals detail how to connect an external source to trigger compression, enabling ducking or rhythmic pumping effects․
Crucially, the documentation explains the integrated sidechain filtering options – high-pass and low-pass filters – which shape the frequency content used for sidechain triggering․ This allows users to focus compression on specific frequency ranges, enhancing clarity and impact․ Proper utilization, guided by the manual, unlocks creative possibilities beyond standard compression․
Power Supply & Voltage Requirements
Distressor manuals thoroughly cover power specifications to ensure optimal and safe operation․ They clearly state the unit is designed for specific voltage ranges, typically 100-120V or 220-240V, with a corresponding 50/60Hz frequency․ The manual emphasizes the importance of verifying local voltage compatibility before connecting the unit to prevent damage․
Detailed diagrams illustrate the power supply connector and fuse requirements․ Manuals also caution against using incorrect fuses, specifying the correct amperage and type․ Adhering to these guidelines, as outlined in the documentation, guarantees reliable performance and protects the Distressor from potential electrical issues․

Understanding the Distressor’s Modes
Distressor manuals detail each mode – Opto, Variable Mu, British, and “Nuke” – explaining their unique sonic characteristics and how to adjust settings accordingly․
Opto Mode: Smooth Compression
Opto mode on the Empirical Labs Distressor emulates the characteristics of classic optical compressors․ Distressor manuals explain this mode delivers a naturally smooth and musical compression, ideal for vocals, bass, and instruments needing gentle dynamic control․ It’s known for its program-dependent attack and release times, reacting organically to the audio signal․
The manual details how Opto mode excels at “glueing” tracks together, adding warmth and cohesion without sounding overly processed․ Users can adjust the Threshold and Ratio controls to fine-tune the compression amount, while the Attack and Release settings are largely automatic, contributing to its ease of use and transparent sound․ It’s a great starting point for beginners exploring the Distressor’s capabilities․
Variable Mu Mode: Vintage Tone
Variable Mu mode within the Distressor, as detailed in its manuals, aims to recreate the sound of vintage tube compressors like the Fairchild 670․ This mode provides a warm, harmonically rich compression, adding character and depth to audio․ The manual explains that adjusting the Threshold and Ratio controls shapes the compression curve, offering a wide range of tonal possibilities․
Unlike Opto mode’s automatic timing, Variable Mu allows for more control over Attack and Release, enabling users to sculpt the compression’s response․ It’s particularly effective on vocals, guitars, and mixes where a vintage vibe is desired, offering a pleasing saturation and subtle harmonic distortion․
British Mode: Aggressive Compression
The Distressor’s British Mode, as outlined in the manual, emulates the characteristics of classic British compressors, known for their aggressive and punchy sound․ This mode delivers a fast attack and noticeable compression, adding significant attitude to drums, bass, and guitars․ The manual details how it introduces a unique harmonic distortion, enhancing the signal’s presence and impact․
Users can expect a more colored and forward sound compared to other modes․ Adjusting the Ratio control in British Mode intensifies the compression effect, while the Threshold determines the onset point․ It’s ideal for tracks needing a bold and in-your-face character․
“Nuke” Mode: Extreme Compression
The Distressor’s “Nuke” mode, detailed in the manual, represents the most aggressive compression setting available․ It’s designed for dramatic effects and is not intended for subtle processing․ This mode bypasses the standard threshold control, applying maximum compression regardless of input level, creating a heavily squashed and distorted sound․
The manual cautions users to approach “Nuke” mode with care, as it can easily lead to over-compression and unwanted artifacts․ It’s often used creatively on drums or vocals to achieve a unique, impactful texture․ Experimentation is key, but monitoring levels is crucial to avoid clipping․
Advanced Techniques & Settings
Distressor manuals detail techniques like parallel compression, creative sidechaining, and saturation, unlocking the unit’s full potential for experienced audio engineers․
Parallel Compression with the Distressor
Distressor manuals frequently highlight parallel compression as a powerful technique․ This involves blending a heavily compressed signal with the original, uncompressed audio․ The Distressor excels at this due to its ability to deliver aggressive, yet controlled, compression․
To achieve this, send a copy of your audio signal to a separate track and apply significant compression using the Distressor – experiment with ratios and thresholds․ Then, carefully blend this compressed signal back with the original, dry signal․ This adds punch and fullness without completely squashing the dynamics․
The manual suggests utilizing the “Nuke” mode for extreme parallel compression effects, particularly on drums and bass, offering a unique sonic texture․ Careful gain staging is crucial for a polished result․
Using the Sidechain for Creative Effects
Distressor manuals detail the sidechain input’s versatility beyond standard compression triggering․ It allows for dynamic control based on an external audio source, opening creative possibilities․ For example, ducking a bassline with a kick drum signal creates rhythmic separation and clarity․
The EL8-S model, as noted in its manual, features enhanced sidechain filtering options for precise control․ Experiment with different frequencies to shape the sidechain’s response․
Furthermore, the sidechain can be used for rhythmic pumping effects or to create space for vocals in a mix․ The manual encourages users to explore unconventional sidechain sources for unique sonic textures and dynamic movement․
Distressor as a Saturation Tool
Distressor manuals highlight its capability beyond compression – it excels as a saturation source․ Even with minimal gain reduction, the Distressor adds harmonic richness and warmth, enhancing tracks without obvious compression artifacts․ The “Dist 2” and “Dist 3” settings, detailed in the user guides, introduce increasing levels of harmonic distortion․
Subtle saturation can glue elements together, while more aggressive settings create grit and character․
Experimenting with different ratios and thresholds allows tailoring the saturation’s intensity and color․ The manual suggests using it on drums, vocals, or entire mixes to add presence and excitement, achieving a polished, professional sound․
Setting Up for Drum Compression
Distressor manuals recommend starting with a fast attack (1-10ms) to capture transients for punch, and a medium release (50-150ms) to avoid pumping․ A ratio of 4:1 is a good starting point, adjusting the threshold to achieve 3-6dB of gain reduction on peaks․
Experiment with the “British Mode” for aggressive, in-your-face drums, or “Opto” for smoother, more controlled compression․
The manual also suggests utilizing the sidechain input for ducking or rhythmic effects․ Fine-tuning attack and release times is crucial for different drum types, ensuring a tight and impactful sound․
Troubleshooting Common Issues
Distressor manuals detail solutions for signal loss, distortion, and compression anomalies, alongside power supply checks, ensuring optimal performance and resolving operational difficulties․
No Signal or Low Output Level
Addressing a lack of signal or diminished output with your Empirical Labs Distressor begins with verifying all cable connections – both input and output XLRs – are secure․ Consult the Distressor manual to confirm correct input gain staging; insufficient input signal won’t trigger compression․
Next, check the output gain control, ensuring it isn’t set too low․ Examine the selected ratio and threshold settings, as extreme settings can sometimes reduce perceived output․ If using the sidechain, verify its input level isn’t attenuating the signal․ Finally, review the power supply connection and voltage requirements detailed in the manual to rule out power-related issues․
Distortion Issues & Solutions
Unwanted distortion in the Empirical Labs Distressor often stems from excessive input or output gain․ Refer to your Distressor manual for recommended gain staging practices․ Experiment with lowering the input gain while increasing the output gain to maintain level without clipping․
The Distressor is designed for harmonic distortion, but excessive amounts can be undesirable․ Adjust the ratio and threshold settings; aggressive compression can exacerbate distortion․ Explore different modes – Opto offers cleaner compression․ Consult the manual for specific mode characteristics․ Finally, ensure your input signal isn’t already distorted before reaching the Distressor․
Unexpected Compression Behavior
If the Distressor exhibits unexpected compression, first consult your Distressor manual regarding the selected mode․ Each mode (Opto, Variable Mu, British, Nuke) behaves differently․ Verify the sidechain settings; improper filtering or engaged sidechain input can drastically alter compression response․
Double-check the attack and release times – fast settings can cause pumping or distortion․ Ensure the threshold is appropriately set relative to the input signal․ Refer to the manual’s troubleshooting section for common issues and solutions․ Finally, confirm the unit isn’t receiving an unintended signal via the sidechain․
Power Supply Problems
Should your Distressor experience power supply issues, the manual stresses verifying the correct voltage is supplied, matching the unit’s requirements․ Check the fuse – a blown fuse is a common culprit․ Ensure the power cable is securely connected to both the Distressor and a functioning power outlet․
If problems persist, consult a qualified technician; attempting self-repair can void the warranty․ The manual details specific voltage requirements for different regions․ Never operate the unit with an incorrect voltage, as this can cause serious damage․ Always disconnect the power before inspecting internal components․
Maintenance & Care
The Distressor manual recommends regular cleaning and operation within a suitable environment to ensure longevity and optimal performance of the unit․
Cleaning the Distressor
Maintaining the Distressor’s pristine condition is crucial for reliable operation․ The user manual advises against using abrasive cleaners or solvents, as these can damage the finish and internal components․ Instead, a soft, dry cloth is recommended for routine dusting of the exterior surfaces․
For more stubborn grime, a slightly dampened cloth with mild soap and water can be used, ensuring it’s thoroughly dried afterward․ Avoid any liquid entering the unit’s internal areas․
Regularly cleaning the front panel controls and connectors helps prevent oxidation and ensures smooth operation․ Proper care, as outlined in the Distressor manual, will contribute to the unit’s long-term performance and aesthetic appeal․
Recommended Operating Environment
The Distressor manual emphasizes maintaining a suitable environment for optimal performance․ Ideal operating temperatures range from 50°F to 95°F (10°C to 35°C), avoiding extreme heat or cold․ Humidity should be kept between 20% and 80% non-condensing, preventing moisture damage․
Avoid exposing the unit to direct sunlight, dust, or vibrations, as these can negatively impact its functionality․
Ensure adequate ventilation around the Distressor to prevent overheating․ Proper environmental control, as detailed in the user guide, will contribute to the unit’s longevity and consistent audio quality, safeguarding your investment․
Servicing & Repairs
The Distressor manual strongly advises against user attempts at internal repairs; opening the unit voids the warranty․ For servicing, contact Empirical Labs directly or an authorized service center․ They possess specialized knowledge and calibrated equipment essential for maintaining the Distressor’s precision․
Do not attempt to replace components or modify the circuitry․
Empirical Labs provides detailed contact information in the manual for support and repair inquiries․ Following these guidelines ensures proper maintenance, preserving the unit’s unique sonic characteristics and extending its operational lifespan, avoiding potential damage․

Distressor EL8-S Specific Features
Distressor EL8-S manuals detail enhanced sidechain capabilities and unique compression characteristics, differentiating it from the standard EL8 and EL8x models․
EL8-S Sidechain Enhancements
The Distressor EL8-S introduces significant improvements to its sidechain functionality, as thoroughly documented in its user manual․ These enhancements provide greater control and creative possibilities for shaping the compressor’s response․ Specifically, the EL8-S offers expanded filtering options within the sidechain path, allowing users to sculpt the frequencies that trigger compression․
This refined sidechain allows for more precise control over dynamic processing, enabling techniques like de-essing or frequency-selective compression; The manual details how to utilize these features for various applications, from subtle dynamic control to dramatic pumping effects․ Users can access detailed explanations and diagrams illustrating the sidechain’s signal flow and available controls within the official documentation․
Differences in Compression Characteristics
The Distressor EL8-S, as outlined in its manual, exhibits subtle yet noticeable differences in compression characteristics compared to the EL8 and EL8X models․ While sharing the core Distressor sound, the EL8-S demonstrates a slightly more nuanced and transparent compression, particularly at lower ratio settings․ This is attributed to refined internal components and calibration adjustments․
The manual details how these differences impact various source materials, offering guidance on selecting the appropriate model for specific applications․ Users will find detailed explanations of the EL8-S’s response to transient material and its ability to maintain clarity even with aggressive compression settings․ Careful study of the manual reveals the EL8-S’s unique sonic signature․

Resources & Further Learning
Official Empirical Labs and PDF-Manuals․com provide Distressor manuals (EL8, EL8X, EL8-S) alongside user forums for deeper understanding and support․
Official Empirical Labs Website
Empirical Labs’ official website serves as the primary hub for all things Distressor․ Here, you’ll discover a wealth of information directly from the source, including downloadable user manuals for every model – the EL8, EL8X, and EL8-S․ These manuals are comprehensive, detailing every control, feature, and potential application of the unit․
Beyond the manuals, the website often features FAQs, technical specifications, and potentially even application notes or tutorials created by the Empirical Labs team․ Checking their site ensures you have the most up-to-date and accurate information regarding your Distressor, avoiding reliance on potentially outdated or inaccurate third-party resources․ It’s the definitive place to start your Distressor journey!
Online Forums & User Groups
Numerous online forums and user groups dedicated to audio engineering and recording frequently host extensive discussions about the Empirical Labs Distressor․ These communities are invaluable resources for practical advice, troubleshooting tips, and shared settings․ Users often post links to helpful resources, including scanned copies of older manuals or detailed explanations of specific features․
While not official sources, these forums provide a real-world perspective on using the Distressor, offering insights you won’t find in the manual itself․ Searching these platforms can uncover creative techniques and solutions to common problems, supplementing the official documentation with collective experience․